Week 3
After a presentation on Magazine design
Introducing InDesign
We will run through an exercise to create a simple Az z-fold brochure about pancakes (it was pancake day after all!)
InDesign is page layout software and is used to design and layout pages for both print and digital. The software is part of Adobe’s Creative Cloud and is available in our teaching rooms and the MACs in the Tonge IT Suite.
What are we Going to Create?
We are going to create a z-fold (sometimes called a concertina fold) brochure that advertises Pancake Day.
Getting started
You will find InDesign by going to the Launchpad and then locating the ID icon. Alternatively, you can search for the application with the Apple spotlight icon (top right in the Apple title bar).
I suggest that once you have got InDesign running then you keep the ID icon in your dock by right clicking the icon and then under Options - choose ‘Keep in Dock’. This will make it easier to find InDesign next time.
InDesign is running I hope!
So lets make some preference settings.
On the MAC
Find the InDesign CC label at the top left (to the right of the Apple symbol). Click here and you will then be able to choose Preferences. This is where you can set things up for yourself even before you start to use the application. Choose Interface
On the PC
You will find preferences under the Edit menu
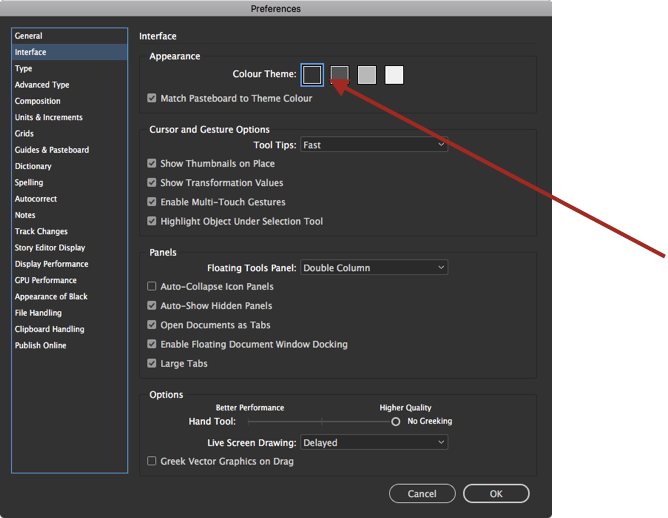
Change the colour theme. I suggest the light grey, but this is your choice. The other settings are OK as the default, but if you should change the units to points rather than picas.
Time to Start a Document.
You may have already experienced the ‘New Document’ panel, when you first started InDesign, but for this exercise you need to find the File > New Document command from the menu bar. (keyboard shortcut is cmd-N).
Here is a screenshot that shows the settings that I want you to use.
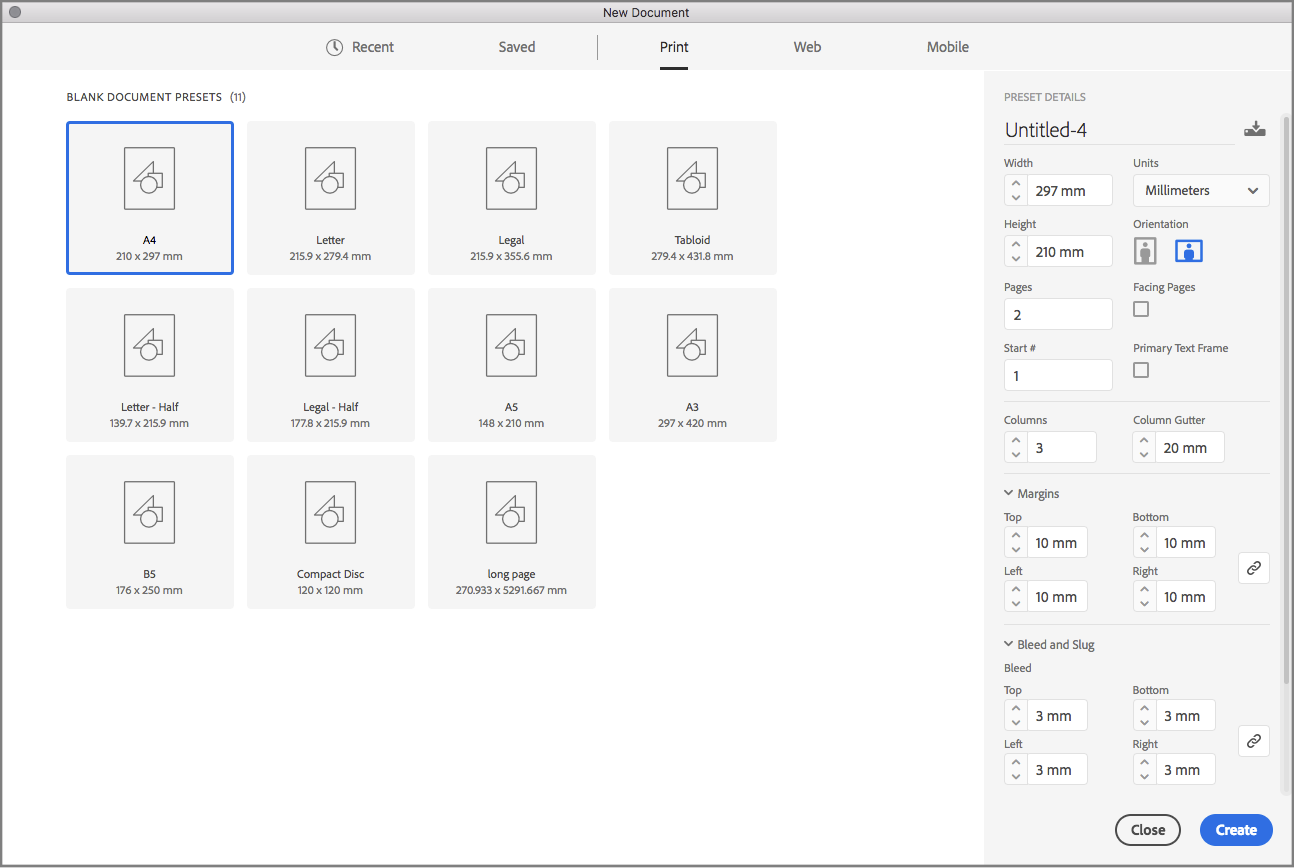
Here are the Settings
Choose A4 as the page size.
- We need landscape
- 2 Pages
- 3 Columns
- Column Gutter 20mm
- Margin 10mm all round
- Bleed 3mm
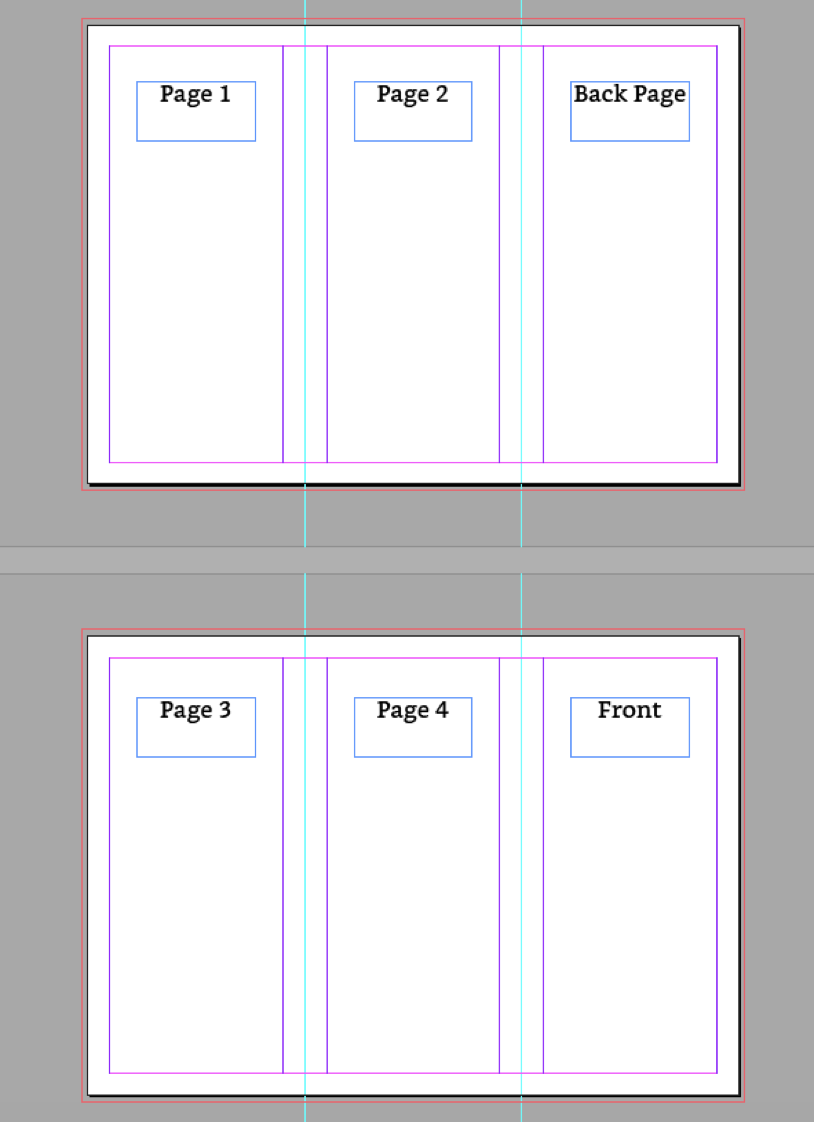
Construct Lines are Always useful
Add some Vertical guides by, first of all showing the rulers and dragging a line from the left ruler until it falls between the pages. You want this line to extend beyond the page, so that you can created a line to help with the fold. We will come to this later. here is what your 2 empty pages will look like (much reduced in size, so you can see the 2 pages).
I have added some text onto these pages to show where the pages will fall, when folded.
What does a Z-Fold brochure look like?
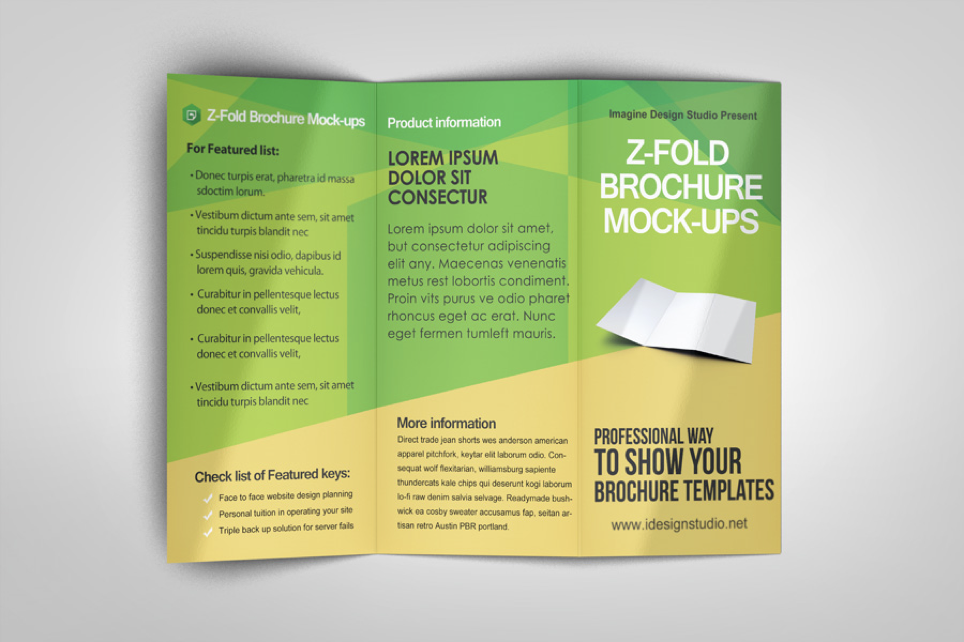
I suggest that you get a piece of A4 paper and fold into 3 and experiment with the direction of the fold. There are variations of this folding methods, but we plan to make the arrangement as shown.
The InDesign Workspace
Take a look at the menu under Window > Workspace
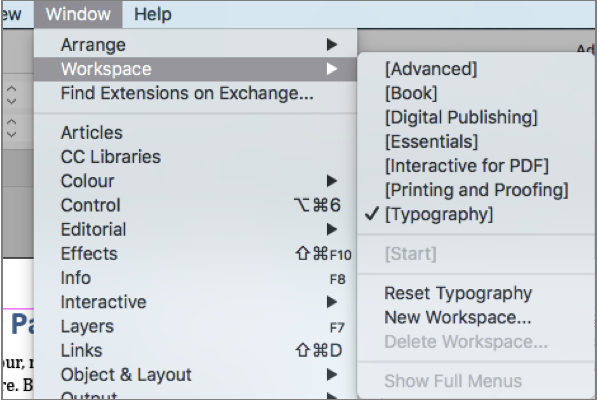
You current workspace maybe one of these ticked. By changing the workspace, you bring up the panels for the various tools.
You can show and hide the panels under the Window menu. You can customise your workspace by Creating a New Workspace.
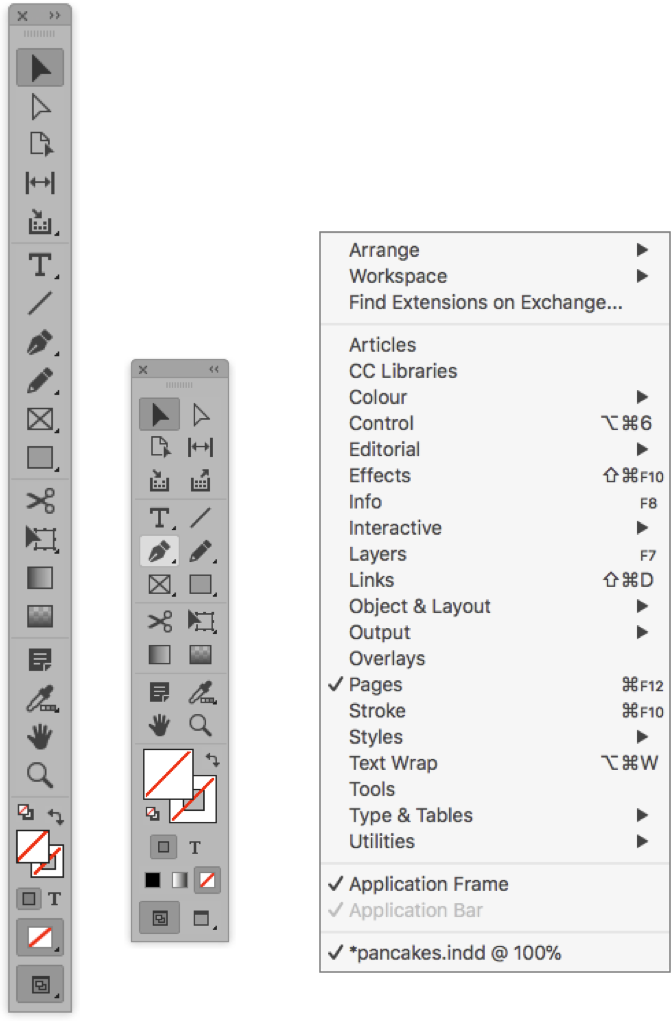
On the left side of your screen you will find the Tool palette. You can configure this to be floating, one column or two.
Save Your New Document
You have created an empty 2 page document - landscape A4 pages.
You should save this somewhere safe.
Time to add some content.
We have an RTF (rich text) document that you can use to Place, on the pages. This document is called pancakes.rtf.
How to Place an external file.
Go to the menu File > Place. Now look for the file that you have downloaded called pancakes.rtf.

Before you select the file, switch on the “Show Imports Options”. When you do this you will get an intermediate panel, with some settings that could be important.
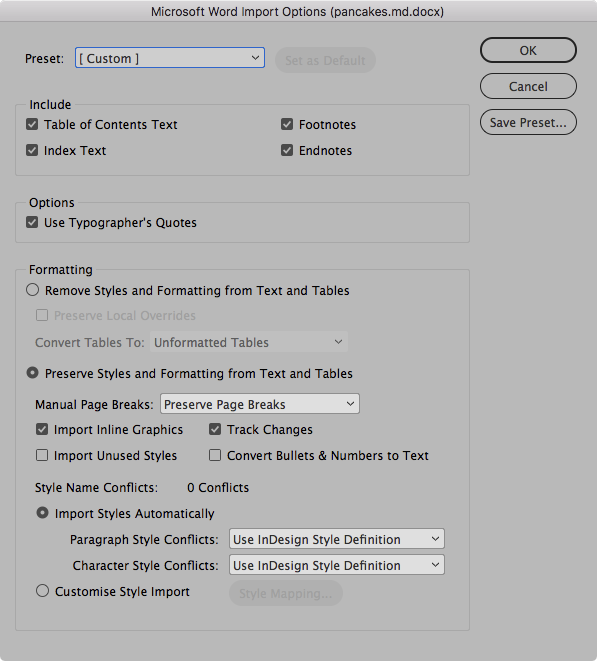
Actually the default setting will probably be OK, but note that we want Typographer’s Quotes and we want to import the styles from the RTF file (although we will change these in InDesign. In this example we don’t have an Index, or table of Contents - nor footnotes. Still, good to know that we have thee setting available!
Once we hit OK, the first lines of the text will appear on the cursor (I can’t illustrate this).
Carefully now…
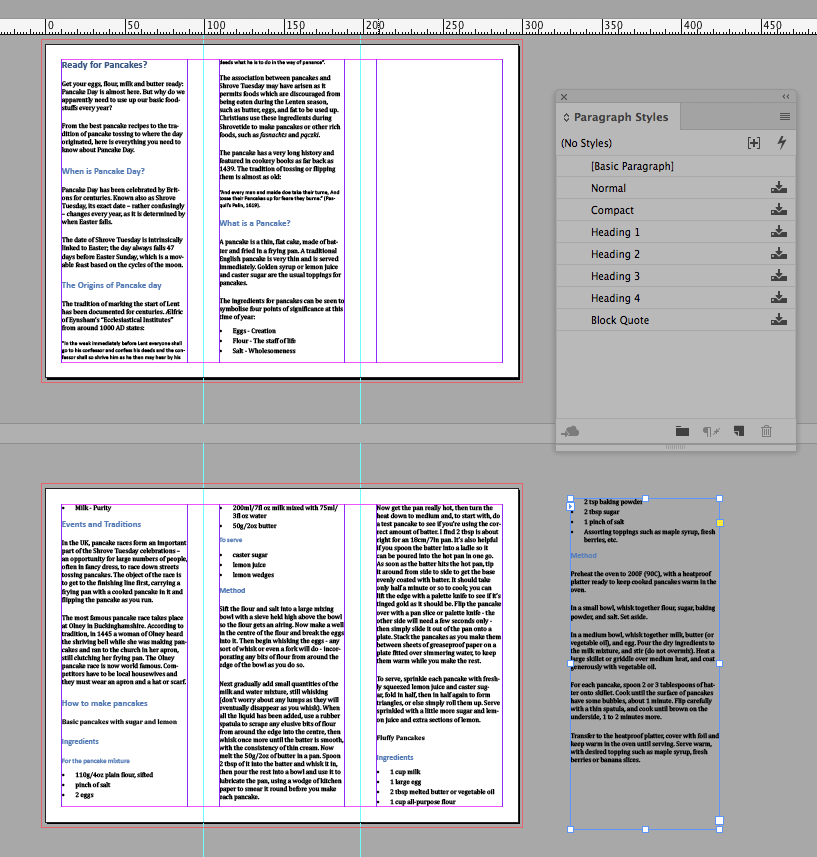
You need to place your filed cursor into the top left corner of the first page (actually, its a column on the left of the first page. Click and let go; your text will flow down the column. When it reaches the end, there will be a small box with a red +.
On to the Next Column
Click you mouse into this small red square and the remaining text will appear on the cursor. Drop this into the top left corner of the next column.
Filling Up
We need to do this for all columns on pages 1, 2, 3 and 4. You need to leave out the front page for the moment; this is the furthest right on the first landscape page.
You may run out of space, so the last drop down can be on the ‘Paste Board’ (the grey area off the page).
Save your work!
Time to Style the Text
It is very likely that the text that the text (particularly the paragraphs) is too big to start with. You may find that it is 12pts and this needs reducing for this size of brochure and the narrow width of the columns.
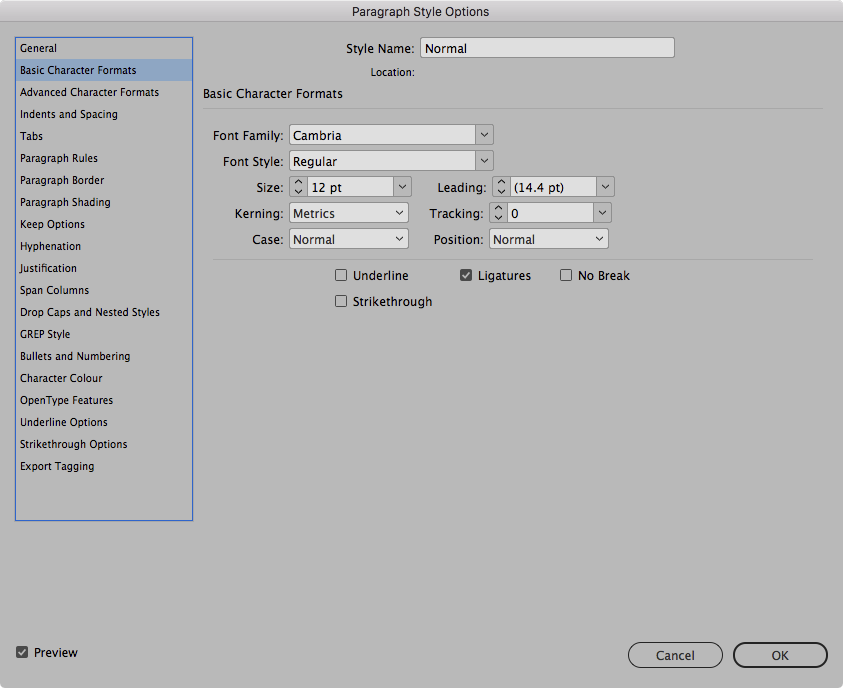
Put your cursor inside any of these paragraphs (not a heading, nor a list). Now locate the Paragraphs styling panel. It may already show, but if not, go to Window > Styles > Paragraph Styles.
You should now see all of the paragraph styles that have come from Word. The one selected is called Normal. Double click the Normal Style.
The first thing to change is under Basic Character Formats; we should reduce the font size to 10pts. If you have the Preview checkbox ticked, this will change on the page
We can change other aspects such as the font, but let’s leave that for moment and start looking at the other styles such as the headings. Heading 1, 2, and 3 need to have less space and this is set under the Indents and Spacing settings.
Now over to you to play with these various settings, change the fonts used and even try different colours.
Depending on how far we get, you can also add text on the from page for the title of the leaflet.
Ready for Pancake day?